
windows admin center on windows server 2022… core
I think the title of this post is fairly self-explanatory: I will be setting up Windows Admin Center (that thing that Server Manager bugs you about everytime you open it), and whilst doing so I will utilise Server Core (as opposed to the Desktop Experience).
Firstly, you may have noticed the large gap in time between this post and the post before this. If you haven’t noticed this or don’t care, feel free to skip this paragraph. If you want an explanation: I’ve been a busy bee. This website and my homelab in general has been more or less ‘on the shelf’, and in the meantime I’ve finished my Level 3 Apprenticeship (and entered full-time employment), I’ve studied for and completed my CompTIA A+, and I’ve done various other things. I have done a few bits and pieces of homelabbing, such as setting up my old PC to run TrueNAS Scale and then turning it into a media server. Why didn’t I make a post about that? Because I don’t think potential employers would appreciate seeing me posting about The Pirate Bay.
But, I’m back. To help jog my memory and get me back in the swing of things, I’ve deleted all of my Windows Virtual Machines and re-created my domain from scratch. As I write this, I have my pfSense router (see this post for details on that), a domain controller, and my WAC server – which is what this post will cover.
So let’s begin. If you’ve read any of my previous posts you’ll know I use Hyper-V when it comes to my Windows labbing, just to keep the theme.
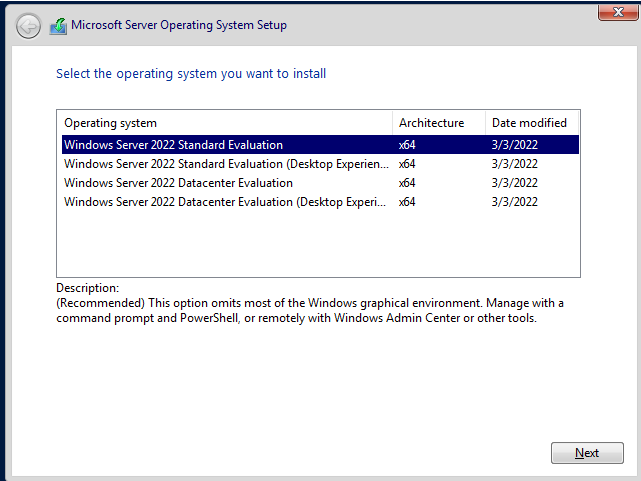
I’m going to skip the details of creating the Virtual Machine itself, as it’s rather bog-standard, but here’s a quick snip just to show you that I’m NOT selecting the ‘Desktop Experience’ option:
Then, I run through the typical setup, which doesn’t differ much from Desktop Experience, perhaps except for the fact that it is a lot quicker. Just a couple of minutes later and I’m presented with a CLI interface and I’m asked to change the default administrator password. Then, we’re set free into, well, what exactly?
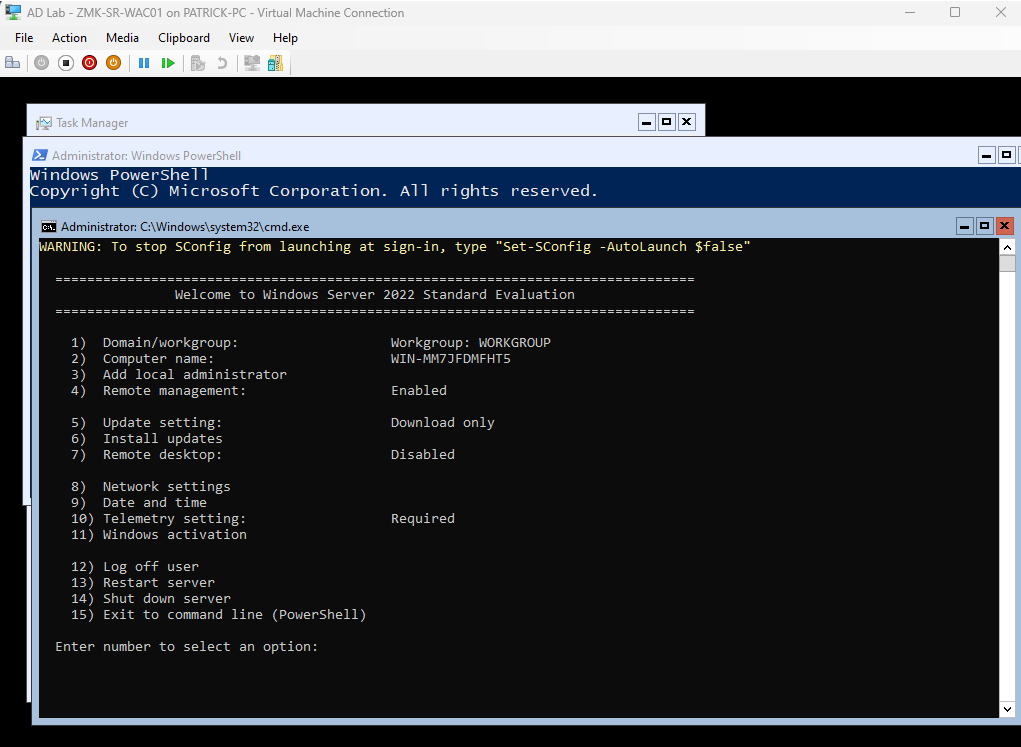
As you can see above, this isn’t just a CLI interface where you are trapped in one little box. We can use CTRL+ALT+DEL to open Task Manager, and from there we can select ‘Run’ to open up extra windows of CMD, PowerShell, or even NotePad. Also, we are immediately presented with a pretty user-friendly way of configuring a lot of our basic options – this is called ‘SConfig’. However, let’s complicate things for ourselves a tad, and use PowerShell to get this server up and running.
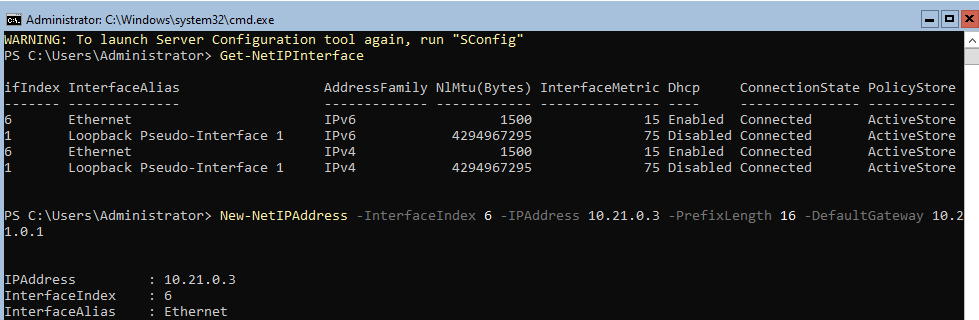
In the screenshot below, I’ve exited to PowerShell then used a couple of cmdlets to identify our various network interfaces, then set our Ethernet interface a static IP address.
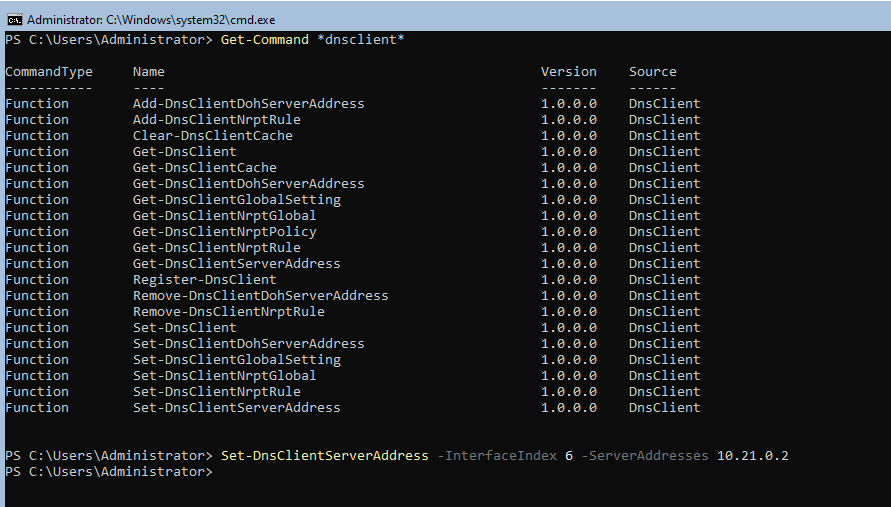
Next, I’ll show off another couple of commands. The Get-Command is used to search through all of the cmdlets available to us. I’ve used a couple of wildcards along with ‘dnsclient’ to find all of the cmdlets pertaining to DNS, in order to try to find the one we need to set our DNS server. Next, I’ve ran the necessary command and set our DNS server to be pointed at our domain controller.
Next, we’ll rename the server.

Finally, let’s get joined to the domain.
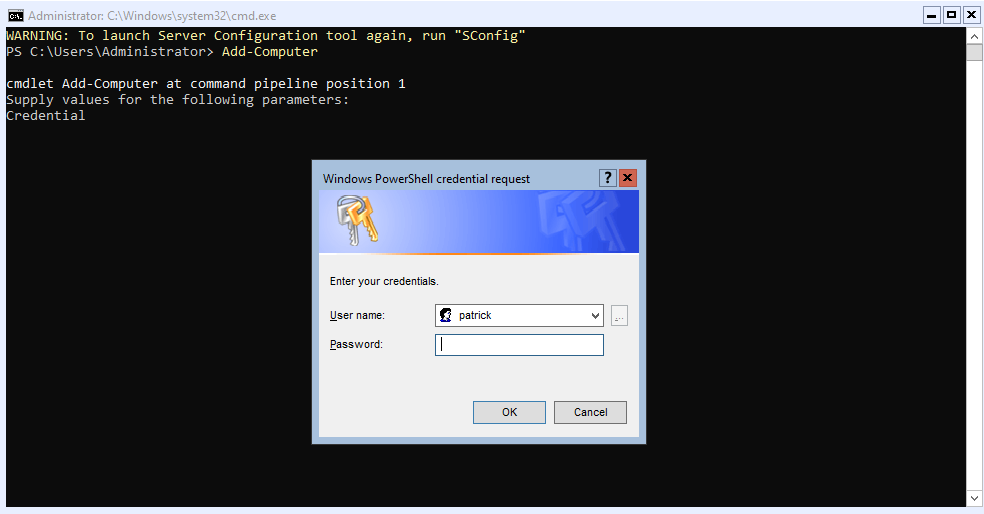
I do say finally, but this didn’t take long at all. If I knew the commands well, this would be much faster than doing the same thing via the GUI in a server with the Desktop Experience. It would probably be even faster if I used SConfig.
We’ve restarted the server (Restart-Computer cmdlet) and now we’re joined to the domain. A couple of things to note here.
Firstly, Restart-Computer will instantly begin the reboot process, not like ‘shutdown’ within cmd which will take an extra minute to shut down unless you stick an option in there. You probably need to appreciate PowerShell more.
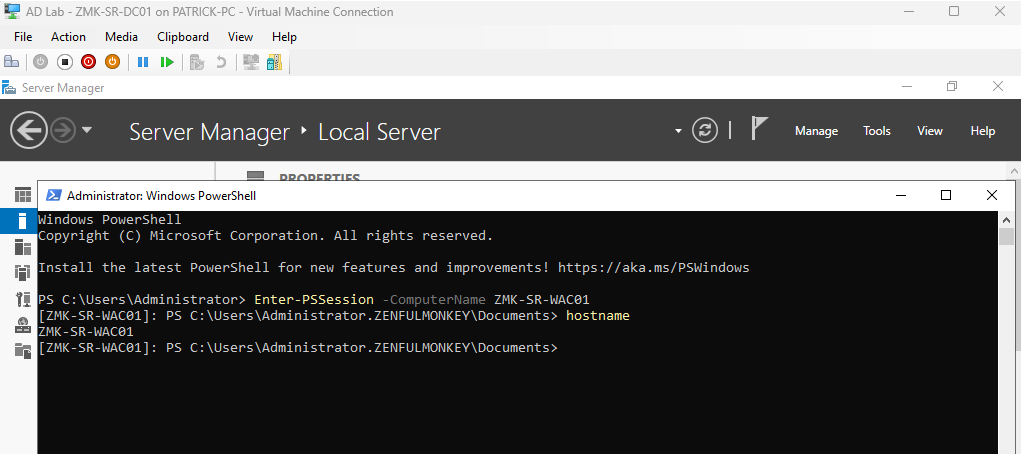
Secondly, as seen in the screenshot below, we can also use PowerShell to remote manage our server. In the screenshot I am connected to my domain controller, and from there I’ve opened up PowerShell and connected to my new server.
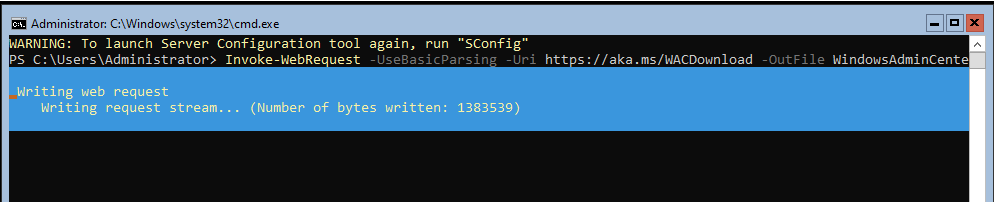
Now, let’s proceed with the installation of the Windows Admin Center. We will begin by downloading the necessary files:
Then, we’ll quickly install a prerequisite and proceed with the installation of WAC itself. Wow, that was quick.
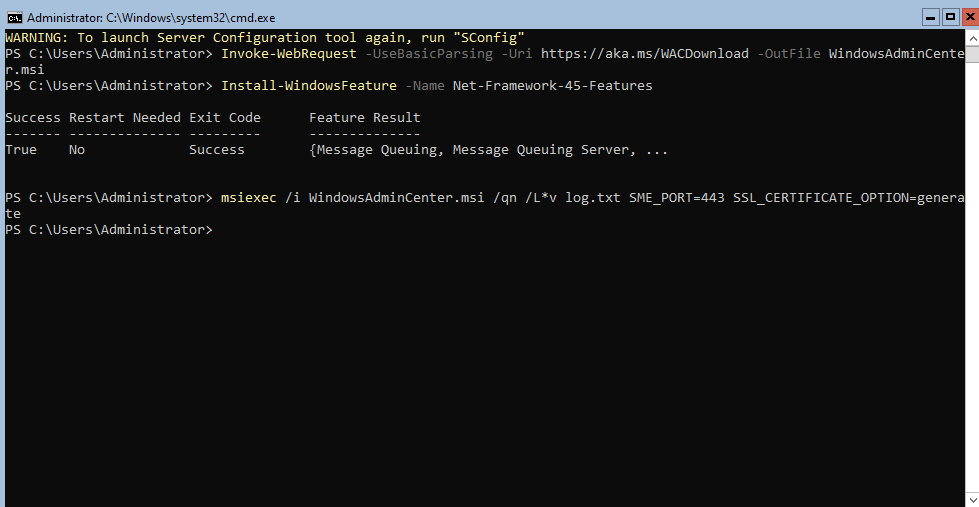
Running that cmdlet is super fast, I my first thought was that it hadn’t done anything. Let’s go back to the domain controller and try to connect to it the web interface. Note that in this command we’ve also specified the usual HTTPS port of 443, and chosen to generate an SSL cert.
This looks promising.
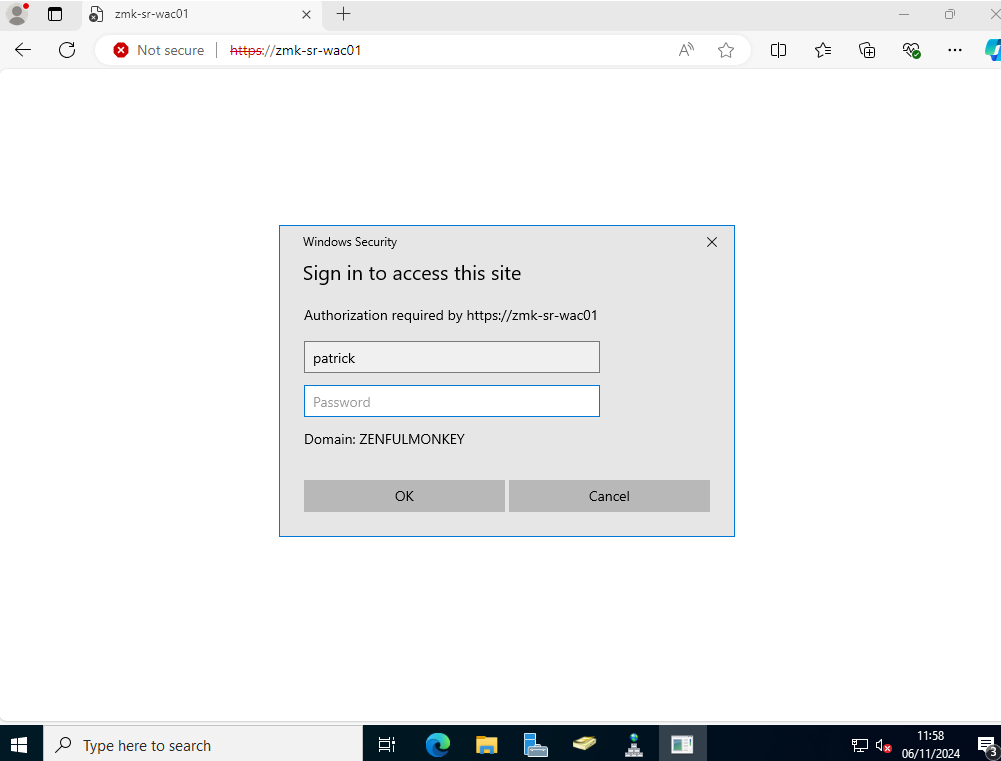
…And we’re in!
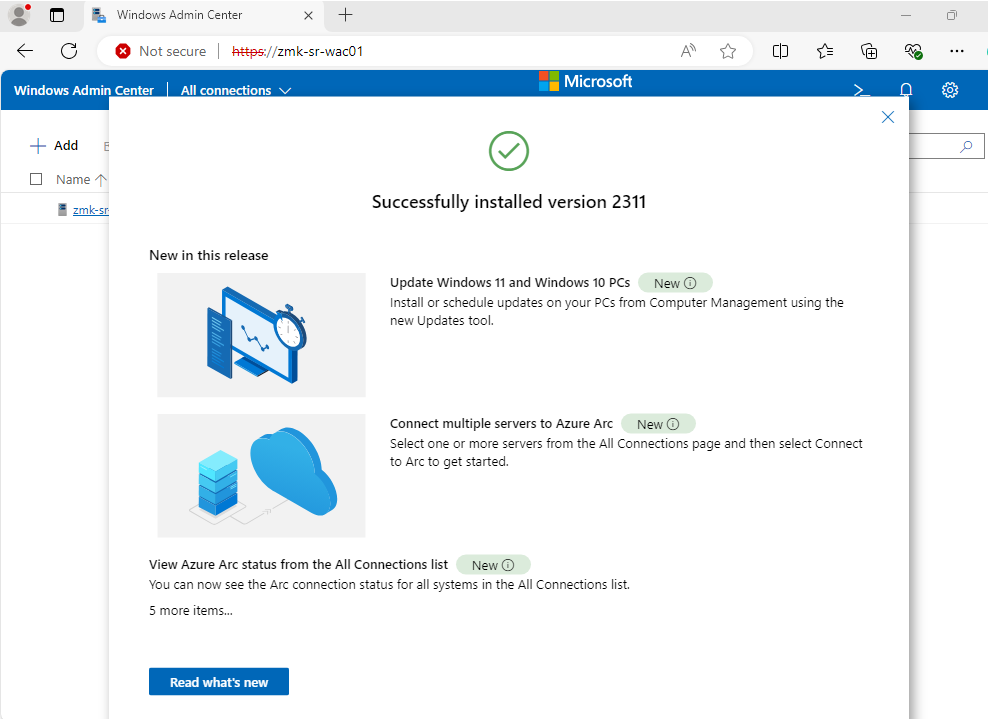
As you can just about see in the background, there’s only one server being managed by WAC, and that’s our ZMK-SR-WAC01, which is where it is installed. Let’s add our domain controller in too, which is a very straightforward process:
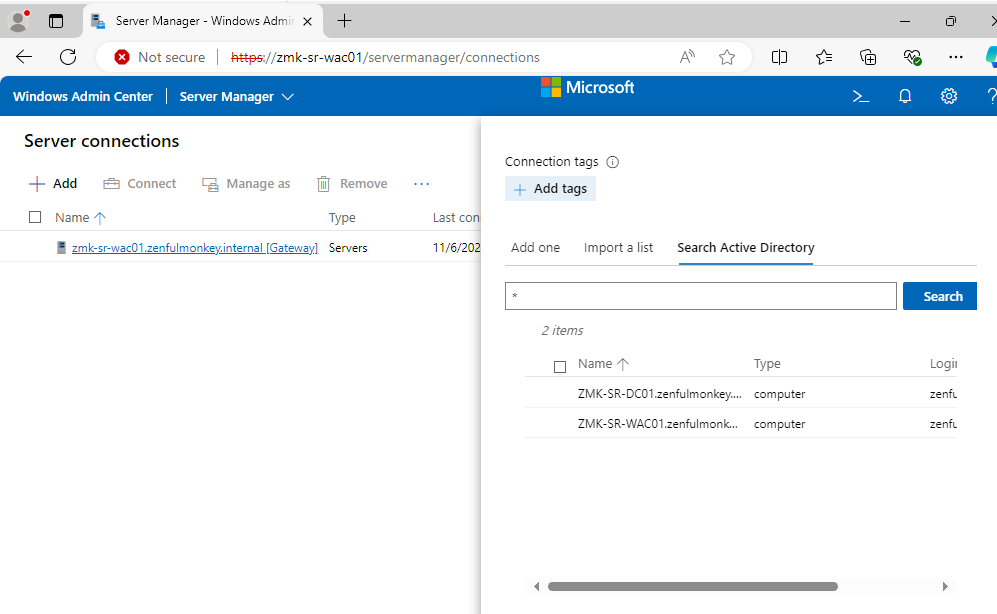
Simply click ‘Add’, ‘Search Active Directory’, and then stick a wildcard in the search bar and we can see all of our servers. It’s as easy as that.
This was supposed to be a fairly short one just to go through the WAC installation process, and as I’m not familiar with WAC itself or its capabilities, I’ll leave it here. However, from a glance it’s clear that there’s plenty we can do from here and plenty of metrics we can see, such as CPU utilisation for all of our servers – it’s nice to have this in a centralised UI rather than having to get onto a server and open Task Manager.
Thanks for reading.
Leave a Reply